I just got a copy of Nancy Silverton's Breads From the La Brea Bakery from my local library.
I really enjoy the stories of her beginnings, and I also like the fact that most of the recipes use a sourdough starter, and they are "pure" sourdough - that is, they are not spiked with commercial instant yeast. Up to this point, all of the sourdough loaves that I have baked have been an adaption of the original Carol Field's Pane Pugliesi.
However, the method that Silverton uses to create her starter is so complicated, and so convoluted that I would encourage anyone starting out to use the Peter Reinhart method of creating a sourdough starter (and then just use 100% hydration to keep it going). Further, Silverton goes on to say that if you are going to cook one recipe from her book, it should be the Basic Loaf - Country White in chapter 3. Well, I hope you have a lot of patience because it takes 14 days just to get the starter created! So, I would not recommend this book as your first bread making book.
A lot of people, including myself, use a 100% hydration starter, but Silverton uses something different - 150% hydration, so there is a little conversion to do.
Here is someone's explanation of how to convert her recipes:
http://www.thefreshloaf.com/node/5843/nancy-silverton039s-breads-la-brea-bakery
I've only used Nancy Silverton's book a couple of times, but here's one way to think about converting recipes from using her starter to using a 100% hydration starter.
She feeds in a ratio of 16 parts water to 11 parts flour by weight. To make things simple, consider that to be around 3 parts water to 2 parts flour by weight. If you think of a 100% hydration starter as 2 parts water and 2 parts flour by weight, then you can easily see that there is a missing 1 part of water in the 100% hydration starter. In other words, the Silverton starter has the same 2 parts water and 2 parts flour as the 100% hydration starter plus one more part of water.
So, to convert the Nancy Silverton starter to use a 100% hydration starter you could do something like:
Divide the weight of the Silverton starter required by 5 to know what "1 part" is. Use 4 times the "1 part" weight of your 100% hydration starter and add 1 part water to it.
For example, the rustic dough bread recipe on page 106 requires 1 pound 3 ounces of white starter. 1 pound 3 ounces is 19 ounces. One fifth of the 19 ounces is 3.8 ounces. You would use 4 time 3.8 ounces, or 15.2 ounces of 100% hydration starter and add 3.8 ounces of water to it to get the equivalent of the 19 ounces of Silverton white starter.
The thing that may not come out the same is the exact flavor. Silverton maintains her starter at high hydration and with fairly low feeding ratios. It will therefore have a more acidic environment on average than a typical 100% hydration starter fed 1:2:2 (starter:water:flour by weight) twice per day. My starter would be even more different, since it is maintained closer to a firm starter and is fed about 1:4:5 once or twice per day and so lives a good part of the time at a higher pH than would be the case with the Silverton method. It is possible that different organisms will prevail in the Silverton starter than in a 100% hydration starter maintained with a higher feeding ratio, since more acid tolerant organisms will be favored, which may have different flavors. Even if it is the same organisms, the population ratios should be more in favor of the yeast, which can tolerate lower pH, over the Lactobacillus bacteria.
The difference in flavor will probably be subtle, but different starters will result in somewhat different bread flavors. In fact, just by luck of the draw starters maintained the same way may have somewhat different flavors, so who knows about all that.
You can use pretty much any starter to make pretty much any bread. You don't have to use the starter method from the book to make the recipe in the book. However, the rise times and consistencies at each stage will be closer to what was intended in the recipe if you contribute the same amount of flour and water in each stage of the recipe.
Bill
End of quote
So, this is the recipe for a single loaf, half of her recipe, and adjusted for a 100% hydration starter:
adjusted for 100% hydration starter half amount recipe:
to get a single "part" of her starter, divide by 5
171g starter (171/5=34g)
485g flour
291g water (257g water + 34g = 291g)
20g wheat germ
8g salt
Here are the steps and a possible timing:
Feed the starter at night, again in the morning.
2pm - Mix the dough
(The guide for the timing is the 5 hour (mine was 6 hours) rise before the dough is placed into the refrigerator for 8 to 12 hours, but not more than 24 hours.)
Mix the starter, water, wheat germ, and flour in the mixer with the dough hook until the dough is formed.
Silverton says 5 minutes - I found the dough formed after 3 minutes, and the dough ball had cleaned the sides of the bowl thoroughly.
Cap the mixing bowl, and let rest for 20 minutes (autolyse).
Add the salt, and mix until the dough is 78 degrees. (I never saw the thermometrer rise a single degree, but I ended up hand kneading for about 10 minutes.)
3pm - First Rise
Place the dough in to a well oiled plastic container for about 4 hours. The volume should double.
(my rise took 5 hours)
8pm - Preshape
Preshape the dough on a floured surface, cover with dusted proofing cloth for 15 minutes.
8:20pm - Intermediate Rise
Shape the boule, place the dough in to a proofing bowl lined with a dusted proofing cloth with the seam side up.
Cover the dough with an oiled piece of plastic for 1 hour at room temperature. The volume should increase by 25%.
9:20pm - Retard the rise
Place the proofing basket in the refrigerator overnight.
8am - The Final rise
Remove the basket, and remove the plastic, and cover with a proofing cloth. Proof for about 3 hours, when the dough has doubled in size, or when the dough is 62 degrees.
10:30am - Oven preheat
about 30 minutes before baking, preheat the oven, stone, and roasting pan to about 500 degrees.
11:00am - Bake
Lightly dust the boule, invert onto a peel (or parchment). Slice the top, and place water in the pan, and place the dough in the oven. Reduce the baking temperature to 450 degrees. Bake until 210 degrees internal temperature.
Saturday, April 2, 2011
A Quick Note
Just a quick note here to say that I created a really nice loaf using the standard recipe for Pane Pugliesi for the 9x5 loaf pan. However, I did make one substitute:
I used 150g of semolina in place of 150g of unbleached flour, and added 10g of water.
So the recipe would look like this:
4755g flour
150g semolina
462g water (100 degrees)
9g salt
5g yeast
If you are not familiar with semolina, it is the coarse ground hard durum wheat grown in the southern part of Italy, including Puglia, which makes it authentic for Pane Pugliesi. There are two types - a durum flour (also called semolina flour) which is very fine, and semolina, which is coarse ground - about the consistency of sand.
Pasta is almost exclusively made from semolina.
I made this in a 9x5 loaf pan, just as before, so I used only about 820g of the dough, and stored the rest in the refrigerator for a day or two - and made a calzone.
Saturday, March 26, 2011
Sourdough English Muffins
The other day, I noticed that my starter was taking longer to double in size - it used to take about 4 hours after feeding it. It then became 10 hours, so I knew somethng was wrong, so I took it out of the fridge, divided it (just in case something went badly with one part), and kept feeding each half every 12 hours. Well, this produced a lot of sourdough starter that needed to be discarded (about a cup total every 12 hours).
I got this recipe from the web
The Fresh Loaf
Sourdough English Muffins
Makes about 12
1/2 C starter (mine is a 100% hydration white starter)
1 C milk
2-3/4 C AP flour
1 TBSP sugar
3/4 tsp salt
1 tsp baking soda
Semolina or cornmeal, for dusting
Combine starter, 2 C of flour and milk in a large bowl. Stir to combine, cover with plastic wrap, and leave out for 8 hours or overnight.
After the overnight rest, add remaining flour (add a little at a time until the dough reaches the proper consistency), sugar, salt and baking soda and mix well.
Turn onto a lightly floured surface and knead for 4-5 minutes.
Roll out to 3/4" and cut with a biscuit cutter into rounds. You can reroll the scraps, but you may need to let the dough rest before cutting more muffins from them.
Place muffins on a piece of parchment dusted with semolina and let rest for 45 minutes.
Spray griddle or skillet lightly with spray oil. Heat to medium and cook muffins for about 6-8 minutes on each side, or until browned on the top and bottom and cooked through. These have great griddle spring and rise quite a bit during the "baking".
Split with a fork and enjoy with your favorite topping!
My Notes:
Personally, I could not seem to get the griddle on the stove top adjusted where it would not burn the tops of the muffins after only a couple of minutes, so I left them on the griddle just long enough to brown and flipped them over. After the other side had browned, and the entire batch was browned on the stove top, I tossed them onto a pizza stone in a 350 degree oven for 9 minutes - flipping them once during the baking. Came out just fine.
Wednesday, March 23, 2011
Using Spring Forms Part 2
Using some tips from Peter Reinart's Artisan Bread Every Day, I made this loaf

The difference is this:
625g flour
452g water (100 degrees)
9g salt
5g yeast (notice that this is more than before .80%)
I mixed the dough using a Kitchen Aid, and then did four folds by hand in the mixing bowl, each 10 minutes apart, before placing the dough into a plastic container, and then into the refrigerator.
After about 12 hours in the refrigerator, I emptied the dough onto an oiled surface, and shaped the loaf into a boule, and placed the dough into a loaf pan (8-1/2" springform lined with parchment).
I preheated the oven to 550 degrees (F), and after adding water to the roasting pan, I lowered the temperature to 450 degrees, and placed the pan with the dough into the oven.
I baked the bread until the internal temperature reached 205 degrees.
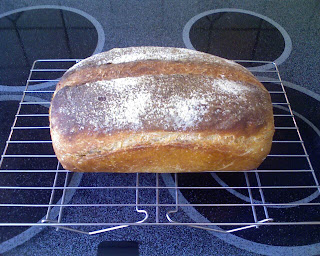
Notice the slight char at the "ear" of the loaf!
This was a spectacular loaf, with great crust and even crumb.
So, for the 9x5 loaf pan, this would be:
Flour...469g....100%
Water...339g....72.3%
Salt......7g.....1.49%
Yeast.....3.75g.....0.80%
Total weight 819g

The difference is this:
625g flour
452g water (100 degrees)
9g salt
5g yeast (notice that this is more than before .80%)
I mixed the dough using a Kitchen Aid, and then did four folds by hand in the mixing bowl, each 10 minutes apart, before placing the dough into a plastic container, and then into the refrigerator.
After about 12 hours in the refrigerator, I emptied the dough onto an oiled surface, and shaped the loaf into a boule, and placed the dough into a loaf pan (8-1/2" springform lined with parchment).
I preheated the oven to 550 degrees (F), and after adding water to the roasting pan, I lowered the temperature to 450 degrees, and placed the pan with the dough into the oven.
I baked the bread until the internal temperature reached 205 degrees.
Notice the slight char at the "ear" of the loaf!
This was a spectacular loaf, with great crust and even crumb.
So, for the 9x5 loaf pan, this would be:
Flour...469g....100%
Water...339g....72.3%
Salt......7g.....1.49%
Yeast.....3.75g.....0.80%
Total weight 819g
Friday, March 11, 2011
Using Loaf Pans
I wanted to try loaf pans just to see what would happen. Using the same recipe for Pane Pugliese, this was:
625g flour
452g water - 100 degrees (F)
9g salt
4g yeast
I used warm water because I wanted a quick ferment. I started at 12noon so that I could get the bread baked by the end of the day, and mixing the ingredients, and let rise for 6 hours at room temperature. I emptied the dough onto a flat surface, and cut the dough in half (by eye), and returned half to the plastic container, and placed it into the refrigerator for use another day.
I did an envelope fold, and shaped the dough into a boule, and placed the boule into a loaf pan that I lined with parchment, and placed some corn meal onto the parchment. I covered the dough with a piece of oiled plastic, and a towel. I let this dough proof for 1 hour, and removed the oiled plastic and towel, and let the dough proof for 1 hour more.
I preheated the oven, pizza stone (on the middle rack), and roasting pan (on the bottom rack) to 450 degrees (F) for about 20 minutes before baking. Just before baking, I lightly dusted the top of the dough with flour, poured a small line of olive oil along the middle of the length of the dough, and used a razor to slice the dough.
I added a cup of heated water to the roasting pan, and placed the loaf pan on the pizza stone for 10 minutes. After 10 minutes, I removed the roasting pan, and continued to bake. After 20 minutes total baking, I removed the parchment from the loaf pan, along with the dough, and slide the dough onto the pizza stone, and rotated it 180 degrees.
After 15 minutes more of baking (total 35 minutes), I inserted the probe from the electronic thermometer, and it quickly alarmed at 205 degrees (so I don't know what the true internal temperature was). I removed the loaf, and allowed it to cool.
The loaf cooled fairly rapidly in about half an hour, and this is what it looked like:

The crust and crumb were excellent, with great flavor. This may quickly become my favorite because of the shorter fermenting, baking, and cooling times.
Some notes:
Peter Reinhart suggests that for a 4-1/2 by 8 inch loaf pan, the dough should weigh 25oz (709g), and for a 5 by 9 inch pan, use 32 to 38 ounces (794 to 907g).
My pan is about 5" x 9-1/4" at the top, and about 4" x 8" at the bottom, and about 2-1/2" deep. It does hold about 8 cups of water to the rim.
He suggests allowing the dough to dome about 1" above the pan.
I calculate that my dough is roughly 1090g total, half is 545g - so this is only about 75% of the smallest reccommended size. I will increase the size of the dough next time, and see if the results are equally as good or better. It looks like (from answer below) that using about 75% of the total dough - just for ease of eyeballing, would be in the correct range (about 817g).
So to reduce the recipe to the loaf pan size:
Flour...625g...100%
Water...452g....72.3%
Salt......9g.....1.44%
Yeast.....4g.....0.64%
Total weight is 1090g, but we only want 820g (rounding for ease), about 75% of the current recipe.
Flour...469g....100%
Water...339g....72.3%
Salt......7g.....1.49%
Yeast.....3g.....0.64%
Total weight 818g
Cooks Illustrated Forum
Cook's Illustrated says:
The "standard" bread pan for quick breads is 9" x5" and holds 8 cups, more or less.
For yeast breads, the standard pan is usually 8½" x 4½" and holds six cups, more or less. I have two of them. If you want only one size loaf pan in the house, this is the one. Many quick bread recipes that call for 9" x 5" pans will fit in 8½ x 4½" pans.
Another useful size, if you can find them is about 7"x 3" with a capacity of about 4 cups. With them, you can make two loaves from a quick bread recipe and three small loaves from a two loaf yeast bread recipe.
Mini pans are usually about 5" by 3" and hold 2 cups. They are sold in sets of four and the set will hold a single recipe designed for 9" x 5" pans.
End quote.
So the next trial was to use the sourdough recipe:
1 cup of starter (about 220-240g)
515g flour
342g water - 100 degrees (F)
9g salt
4g yeast
I followed the same directions as above, except the first rise took only about 3 hours (this was too much yeast because of the leavening power of the sourdough). I used 813g of dough (it was the closest I could get to 817g when cutting it), and the dough rose too much during the second rise.
One trick that I used here that I would repeat was to trace the bottom of my loaf pan onto the parchment, and then cut from the edge of the paper to the ends of the short side of the pan. Then I folded the paper into the pan (folding the long sides around the back of the short sides), and cut the paper down to the corners, and folded the paper down - just to keep it out of the way.
The bread came out very tasty with good crust and crumb. You can see that the crust separated from the crumb somewhat, and that was probably due to too much yeast.
To reduce the sourdough recipe,
The sourdough starter was originally about 20% of the total weight. That would calculate to:
Sourdough starter 164g (82g flour + 82g water, about 3/4 cup, more or less)
Flour...387g....100% (469g-82g)
Water...257g....72.3% (339g-82g)
Salt......7g.....1.49%
Yeast.....1.5g.....(reduced amount)
Total weight 817g
More sourdough could be used, but I like the flavor that it adds without becoming "sourdough" bread.
625g flour
452g water - 100 degrees (F)
9g salt
4g yeast
I used warm water because I wanted a quick ferment. I started at 12noon so that I could get the bread baked by the end of the day, and mixing the ingredients, and let rise for 6 hours at room temperature. I emptied the dough onto a flat surface, and cut the dough in half (by eye), and returned half to the plastic container, and placed it into the refrigerator for use another day.
I did an envelope fold, and shaped the dough into a boule, and placed the boule into a loaf pan that I lined with parchment, and placed some corn meal onto the parchment. I covered the dough with a piece of oiled plastic, and a towel. I let this dough proof for 1 hour, and removed the oiled plastic and towel, and let the dough proof for 1 hour more.
I preheated the oven, pizza stone (on the middle rack), and roasting pan (on the bottom rack) to 450 degrees (F) for about 20 minutes before baking. Just before baking, I lightly dusted the top of the dough with flour, poured a small line of olive oil along the middle of the length of the dough, and used a razor to slice the dough.
I added a cup of heated water to the roasting pan, and placed the loaf pan on the pizza stone for 10 minutes. After 10 minutes, I removed the roasting pan, and continued to bake. After 20 minutes total baking, I removed the parchment from the loaf pan, along with the dough, and slide the dough onto the pizza stone, and rotated it 180 degrees.
After 15 minutes more of baking (total 35 minutes), I inserted the probe from the electronic thermometer, and it quickly alarmed at 205 degrees (so I don't know what the true internal temperature was). I removed the loaf, and allowed it to cool.
The loaf cooled fairly rapidly in about half an hour, and this is what it looked like:

The crust and crumb were excellent, with great flavor. This may quickly become my favorite because of the shorter fermenting, baking, and cooling times.

Some notes:
Peter Reinhart suggests that for a 4-1/2 by 8 inch loaf pan, the dough should weigh 25oz (709g), and for a 5 by 9 inch pan, use 32 to 38 ounces (794 to 907g).
My pan is about 5" x 9-1/4" at the top, and about 4" x 8" at the bottom, and about 2-1/2" deep. It does hold about 8 cups of water to the rim.
He suggests allowing the dough to dome about 1" above the pan.
I calculate that my dough is roughly 1090g total, half is 545g - so this is only about 75% of the smallest reccommended size. I will increase the size of the dough next time, and see if the results are equally as good or better. It looks like (from answer below) that using about 75% of the total dough - just for ease of eyeballing, would be in the correct range (about 817g).
So to reduce the recipe to the loaf pan size:
Flour...625g...100%
Water...452g....72.3%
Salt......9g.....1.44%
Yeast.....4g.....0.64%
Total weight is 1090g, but we only want 820g (rounding for ease), about 75% of the current recipe.
Flour...469g....100%
Water...339g....72.3%
Salt......7g.....1.49%
Yeast.....3g.....0.64%
Total weight 818g
Cooks Illustrated Forum
Cook's Illustrated says:
The "standard" bread pan for quick breads is 9" x5" and holds 8 cups, more or less.
For yeast breads, the standard pan is usually 8½" x 4½" and holds six cups, more or less. I have two of them. If you want only one size loaf pan in the house, this is the one. Many quick bread recipes that call for 9" x 5" pans will fit in 8½ x 4½" pans.
Another useful size, if you can find them is about 7"x 3" with a capacity of about 4 cups. With them, you can make two loaves from a quick bread recipe and three small loaves from a two loaf yeast bread recipe.
Mini pans are usually about 5" by 3" and hold 2 cups. They are sold in sets of four and the set will hold a single recipe designed for 9" x 5" pans.
End quote.
So the next trial was to use the sourdough recipe:
1 cup of starter (about 220-240g)
515g flour
342g water - 100 degrees (F)
9g salt
4g yeast
I followed the same directions as above, except the first rise took only about 3 hours (this was too much yeast because of the leavening power of the sourdough). I used 813g of dough (it was the closest I could get to 817g when cutting it), and the dough rose too much during the second rise.

One trick that I used here that I would repeat was to trace the bottom of my loaf pan onto the parchment, and then cut from the edge of the paper to the ends of the short side of the pan. Then I folded the paper into the pan (folding the long sides around the back of the short sides), and cut the paper down to the corners, and folded the paper down - just to keep it out of the way.
The bread came out very tasty with good crust and crumb. You can see that the crust separated from the crumb somewhat, and that was probably due to too much yeast.

To reduce the sourdough recipe,
The sourdough starter was originally about 20% of the total weight. That would calculate to:
Sourdough starter 164g (82g flour + 82g water, about 3/4 cup, more or less)
Flour...387g....100% (469g-82g)
Water...257g....72.3% (339g-82g)
Salt......7g.....1.49%
Yeast.....1.5g.....(reduced amount)
Total weight 817g
More sourdough could be used, but I like the flavor that it adds without becoming "sourdough" bread.

Saturday, March 5, 2011
Using Springform Pans
One of the characteristics of Pane Pugliese is that it is a free form hearth bread. However, because the dough is so slack (wet), it creates a very flat loaf.
I personally like to use this bread for sandwiches (as well as everything else), so I want to create a loaf that has more height.

This is how I did it.
Using the formula and technique on this page:
No Refrigerator Pane Pugliese
After allowing the dough to ferment all night at room temperature, I lined a 8.5" springform pan with a piece of parchment that was about 13" square. This just happens to be the length of my particular parchment. I then sprinkled some cornmeal onto the parchment paper, and set this pan aside.
I emptied the dough onto a well floured flat surface, and did an envelope fold. I flipped the dough over, and formed a boule, and placed it into the middle of the springform pan. Hamelman or Envelope Fold
I covered the dough with a piece of plastic that I lightly oiled with olive oil, and let this sit, covered with a towel for about 2 hours. (It probably did not need to be that long, but I went for a bike ride, and set the oven to turn on about 30 minutes before I returned from my ride.) I placed a pizza stone on the oven middle rack, and a large roasting pan on the bottom rack.
When I returned, the oven was preheated to 450 degrees (F). I heated a cup of water in the microwave for 2 minutes, and in the meantime, I carefully removed the plastic from the dough, and lightly dusted the the top of the dough, and made a single razor cut down the center.
I poured half the water into the roasting pan, and closed the oven door quickly. When I was ready, I placed the springform pan onto the pizza stone, poured the rest of the water into the roasting pan, and closed the door. After 10 minutes, I removed the pan of water. After another 10 minutes of baking (20 minutes total), I opened the springform, and lifted the dough by pulling up on the parchment on two sides. I placed the parchment and dough back onto the pizza stone for about 5 minutes, and then removed the parchment after about 25 minutes total baking time.
I used a probe thermometer to monitor the internal temperature to 205 degrees (F), and removed the loaf.

12 Stages of Bread Making
Peter Reinhart video
Bread Essentials - The 12 Stages of Bread Production ~ the butcher, the baker
Alice Q. Foodie says it this way:
1.scaling (ingredients)
2.mixing (kneading)
3.fermentation (rising)
4.punching
5.scaling dough (dividing)
6.rounding
7.benching
8.makeup and panning
9.proofing
10.baking
11.cooling
12.storing (or eating, if you are like me)
Friday, February 11, 2011
Cost and Calories
CALORIES
I was curious about the amount of calories in the Pane Pugliese, so here are the nutrition facts of Unbleached All Purpose Flour:
Nutrition Facts (Kroger All Purpose Flour)
Serving Size: 1/4 cup
Amount per Serving
Calories 100
Total Carbohydrate 22g
Dietary Fiber 0g
Protein 3g
Depending on the source, it looks like 30g of flour is equal to a 1/4 cup. So if we divide the 625g (flour) by 30 = 20.84 and multiply by 100 calories, the total calories in the loaf are approximately 2084 calories.
Using the Weight Watchers points method (old version), I figure that you need to get 36 slices of bread at about 60 calories per slice. My loaves are 8.5" in diameter, and about 3.5 inches tall. Cut that into 4 quarters, so each quarter needs to be cut into slices of bread to have 1 point per slice. Each slice would be 3.5 inches tall, by 4.25 inches long, by 3/8". Of course, the slices get smaller as you move toward the edge - maybe slice the longer pieces thinner, and the shorter pieces fatter.
Another way of calculating would be to actually weigh your loaf - mine came out to be a little over 2 lbs. Multiply the number of pounds by 454(grams in a pound), and then divide that number by 36 to get the number of grams in each 1 point slice. In my case, 2x454=908/36 = 25 grams per slice.
COST
I use Kroger Unbleached All Purpose Flour that cost $1.98 for a 5lb bag. The price just went up from $1.48 a bag.
There are approximately 454 grams in a pound, so a bag of flour has 5x454 = 2270 grams of flour. If our recipe contains 625 grams of flour, then we get 3.6 loaves from a bag. Rounding that off to 3.5 to account for bench flour, then the cost of a loaf is around $.57, or say 60 cents (add a few cents for yeast) per loaf. Not bad.
You could use King Arthur flour if you want to pay over $5 per bag for the same nutritional values, but that is your choice. I did try a bag once, and had the exact same results in the bread taste, rise, etc.
By the way, I found a 1lb bag of SAF Instant Yeast at Costco Business (not at the regular Costco - they only had active dry yeast) for around $2.50. Using 4 grams of yeast per loaf, that should be over 110 loaves. That calculates out to less than 3 cents per loaf for the cost of yeast.
Wednesday, February 9, 2011
Sourdough
Here are some linked videos from Breadtopia.com:
Breadtopia
The first video is how to create a starter.
The next one is how to dry the sourdough starter for transport or storage.
I would just add from my own experience that you don't have to put this in the oven, but any wire rack, such as those that you use to cool your bread, will work fine. I left mine out until it was completely dried, and it peeled off of the parchment. I broke it into squares, and then put it into a ziplock bag, and crumbled it up into small pieces.
The next video is how to revive the dried sourdough starter here:
The next video is how to maintain your starter:
Feeding the starter:
According to Peter Reinhart in "Artisan Breads Every Day", you should feed the starter in a 3 to 1 weight ratio, that is 94g of flour to 28g of starter, and the water should be the same percentage as the final dough. In our case, we are using the hydration percentage of 72.5 percent, or X divided by 94 times 100 = 72.5. Then X = approximately 68g of water. That would create a starter that weighs 190g from just one ounce of starter.
Using the starter:
The Fresh Loaf
This post suggest using 10% starter to total flour weight if doing a 12 hour overnight rise.
Currently, the total weight of flour and water combined is 625+452 = 1077g
.10Y+Y+X=1077 or 1.1Y+X=1077
and
100X/Y=72.5 where Y is weight of flour, and X is weight of water
60g starter (around 1/4 cup)
600g flour
435g water
1095g total (pretty close to the goal of 1077)
Using Peter Reinhart's formula, on the morning before creating the dough, take 60g of seed starter, 180g flour, and 131g of water to create the final starter (371g total).
Leave it at room temperature for 8 hours, then remove 60g and added it to the formula above to create dough. (600g flour, 435g water, and 9g of salt). Let this dough sit at room temperature overnight, and bake it in the morning.
The rest of the final starter was placed in the refrigerator for future use.
Peter Reinhart's recipe for San Francisco Sourdough Bread (for two loaves) uses 75% finished starter - so the formula for Pane Pugliese would be 400g flour, 300g starter, and 290g water.
Another way of looking at it comes from another Peter Reinhart book called "The Bread Baker's Apprentice" in which he says to replace the biga with an equal amount (by weight) of starter. In the Pane Pugliese recipe that he offers, this amounts to 105% of the flour.
Using the starter (second opinion):
Sourdough Home
This author suggests using 1 cup of active starter to substitute for 6g of yeast. Since our original Pane Pugliese recipe calls for 4g of yeast, so I used 1 cup of starter.
He also suggests three rules for feeding the starter:
1.Sourdough starter at room temperature must be fed no less than twice a day.
2.Each feeding of the starter should be enough to double its size.
3.Each feeding should be equal amounts of water and flour, by weight.
He goes on to say "An active starter is one that has fed within the past 12 hours, and that is active enough that it was able to double in size after that feeding."
We will need to subtract some flour and some water from the original recipe. He suggests that the starter is about half flour, and half water per cup, and I measured 1 cup of starter to be 220g. That calculates to about 110g each that needs to be subtracted from our original recipe.
625-110=515g flour
452-110=342g water
9g salt
I added 2g of instant yeast, and the bread came out delicious. But it was very slack, and the loaf did not rise much during baking, and could not be formed into much of a loaf.
I am going to try 4g of yeast to see if that will make the dough a little stiffer.
Update: I did try 4g of yeast, and the bread came out excellent, but still not as much rise as I would like. I tried a "proofing" stage for about 2 hours before baking by placing the dough in a 10" springform pan, after doing an envelope fold. I covered the dough with an oiled piece of plastic wrap, but the dough did not rise much. In comparison, I did the same thing (I will write about this on a different page with pictures) with the regular Pane Pugliese dough, and the dough almost doubled in size. I believe that perhaps the sourdough, along with 4g of yeast, may use up all of the available food, and thereby did not rise again. I am going to try this again, but let the dough rise for a few hours in the primary fermentation stage, and then refrigerate it overnight. That should leave some food available for a second rise.
I have been really happy with using this formula for keeping the sourdough well maintained: I started with 240g of starter kept in the refrigerator. On the morning the day before that actually bake, I spoon out 120g of starter into a second container.
To each container, I add 60g of flour and 60g of water. I refrigerate the original container - now it contains 240g of starter that has been fed. This should be good for use for 5-7 days or so.
The second container is allowed to stay at room temperature until I am ready to mix the dough. This starter should double in size in about 4-6 hours, and needs to be used within about 12 hours. This container also contains 240g of starter, which will be about 1 cup in volume when ready for use.
Maintaining Sourdough Starter from King Arthur Flour
Recipe Update:
This is the recipe I used:
1 cup (about 220-240g of starter)
515g flour
342g water (tap temperature)
9g salt
1.5g yeast
Note the two big changes in the recipe - the use of only 1.5g of yeast, and using cool water, instead of warm water.
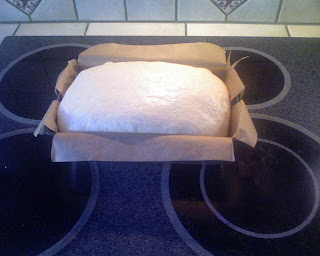
I let this ferment overnight for 12 hours, and then lined a 8.5" x 2.5" springform with parchment paper, and put a small amount of cornmeal on the parchment. I formed a boule from the dough, and placed it into the parchment, lined the top with a piece of oiled plastic, and covered it with a towel for 2 hours. The picture was taken after the 2 hour rise.

The oven was preheated to 450 degrees (F), along with a pizza stone on the middle rack and a large roasting pan on the bottom rack. About a cup of hot water was added to the roasting pan before baking the dough. A little flour was dusted onto the dough, and the dough was scored with a single razor cut along the center, and the springform pan with the dough was placed in the oven on the pizza stone to bake.
After baking 10 minutes, the pan of water was removed, and the dough continued to bake for about another 15 minutes. I then removed the bread by pulling up on the parchment, and place the parchment containing the dough directly onto the pizza stone. After baking another 5 minutes, I removed the parchment from underneath the dough, and let it continue to bake until the center of the dough reached 205 degrees.


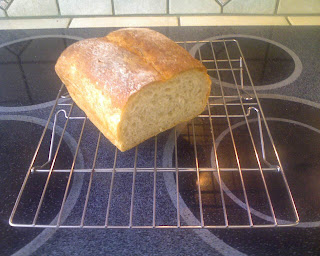
After the bread cooled to room temperature, I cut the loaf, and this is what it looked like. A nice uniform bread, with great flavor - and it makes wonderful toast.
Breadtopia
The first video is how to create a starter.
The next one is how to dry the sourdough starter for transport or storage.
I would just add from my own experience that you don't have to put this in the oven, but any wire rack, such as those that you use to cool your bread, will work fine. I left mine out until it was completely dried, and it peeled off of the parchment. I broke it into squares, and then put it into a ziplock bag, and crumbled it up into small pieces.
The next video is how to revive the dried sourdough starter here:
The next video is how to maintain your starter:
Feeding the starter:
According to Peter Reinhart in "Artisan Breads Every Day", you should feed the starter in a 3 to 1 weight ratio, that is 94g of flour to 28g of starter, and the water should be the same percentage as the final dough. In our case, we are using the hydration percentage of 72.5 percent, or X divided by 94 times 100 = 72.5. Then X = approximately 68g of water. That would create a starter that weighs 190g from just one ounce of starter.
Using the starter:
The Fresh Loaf
This post suggest using 10% starter to total flour weight if doing a 12 hour overnight rise.
Currently, the total weight of flour and water combined is 625+452 = 1077g
.10Y+Y+X=1077 or 1.1Y+X=1077
and
100X/Y=72.5 where Y is weight of flour, and X is weight of water
60g starter (around 1/4 cup)
600g flour
435g water
1095g total (pretty close to the goal of 1077)
Using Peter Reinhart's formula, on the morning before creating the dough, take 60g of seed starter, 180g flour, and 131g of water to create the final starter (371g total).
Leave it at room temperature for 8 hours, then remove 60g and added it to the formula above to create dough. (600g flour, 435g water, and 9g of salt). Let this dough sit at room temperature overnight, and bake it in the morning.
The rest of the final starter was placed in the refrigerator for future use.
Peter Reinhart's recipe for San Francisco Sourdough Bread (for two loaves) uses 75% finished starter - so the formula for Pane Pugliese would be 400g flour, 300g starter, and 290g water.
Another way of looking at it comes from another Peter Reinhart book called "The Bread Baker's Apprentice" in which he says to replace the biga with an equal amount (by weight) of starter. In the Pane Pugliese recipe that he offers, this amounts to 105% of the flour.
Using the starter (second opinion):
Sourdough Home
This author suggests using 1 cup of active starter to substitute for 6g of yeast. Since our original Pane Pugliese recipe calls for 4g of yeast, so I used 1 cup of starter.
He also suggests three rules for feeding the starter:
1.Sourdough starter at room temperature must be fed no less than twice a day.
2.Each feeding of the starter should be enough to double its size.
3.Each feeding should be equal amounts of water and flour, by weight.
He goes on to say "An active starter is one that has fed within the past 12 hours, and that is active enough that it was able to double in size after that feeding."
We will need to subtract some flour and some water from the original recipe. He suggests that the starter is about half flour, and half water per cup, and I measured 1 cup of starter to be 220g. That calculates to about 110g each that needs to be subtracted from our original recipe.
625-110=515g flour
452-110=342g water
9g salt
I added 2g of instant yeast, and the bread came out delicious. But it was very slack, and the loaf did not rise much during baking, and could not be formed into much of a loaf.
I am going to try 4g of yeast to see if that will make the dough a little stiffer.
Update: I did try 4g of yeast, and the bread came out excellent, but still not as much rise as I would like. I tried a "proofing" stage for about 2 hours before baking by placing the dough in a 10" springform pan, after doing an envelope fold. I covered the dough with an oiled piece of plastic wrap, but the dough did not rise much. In comparison, I did the same thing (I will write about this on a different page with pictures) with the regular Pane Pugliese dough, and the dough almost doubled in size. I believe that perhaps the sourdough, along with 4g of yeast, may use up all of the available food, and thereby did not rise again. I am going to try this again, but let the dough rise for a few hours in the primary fermentation stage, and then refrigerate it overnight. That should leave some food available for a second rise.
I have been really happy with using this formula for keeping the sourdough well maintained: I started with 240g of starter kept in the refrigerator. On the morning the day before that actually bake, I spoon out 120g of starter into a second container.
To each container, I add 60g of flour and 60g of water. I refrigerate the original container - now it contains 240g of starter that has been fed. This should be good for use for 5-7 days or so.
The second container is allowed to stay at room temperature until I am ready to mix the dough. This starter should double in size in about 4-6 hours, and needs to be used within about 12 hours. This container also contains 240g of starter, which will be about 1 cup in volume when ready for use.
Maintaining Sourdough Starter from King Arthur Flour
Recipe Update:
This is the recipe I used:
1 cup (about 220-240g of starter)
515g flour
342g water (tap temperature)
9g salt
1.5g yeast
Note the two big changes in the recipe - the use of only 1.5g of yeast, and using cool water, instead of warm water.
I let this ferment overnight for 12 hours, and then lined a 8.5" x 2.5" springform with parchment paper, and put a small amount of cornmeal on the parchment. I formed a boule from the dough, and placed it into the parchment, lined the top with a piece of oiled plastic, and covered it with a towel for 2 hours. The picture was taken after the 2 hour rise.

The oven was preheated to 450 degrees (F), along with a pizza stone on the middle rack and a large roasting pan on the bottom rack. About a cup of hot water was added to the roasting pan before baking the dough. A little flour was dusted onto the dough, and the dough was scored with a single razor cut along the center, and the springform pan with the dough was placed in the oven on the pizza stone to bake.
After baking 10 minutes, the pan of water was removed, and the dough continued to bake for about another 15 minutes. I then removed the bread by pulling up on the parchment, and place the parchment containing the dough directly onto the pizza stone. After baking another 5 minutes, I removed the parchment from underneath the dough, and let it continue to bake until the center of the dough reached 205 degrees.


After the bread cooled to room temperature, I cut the loaf, and this is what it looked like. A nice uniform bread, with great flavor - and it makes wonderful toast.
Flavor experiments
I am starting a new phase of experimentation - two actually. I am going to continue to work with the Pane Pugliese, but try to increase the flavor, if possible, by slowing the fermentation.
I have already experimented with refrigeration, and although the flavor was very good, the rise of the loaf was not as good as using no refrigeration.
I have just purchased a copy of Peter Reinhart's book "Artisan Bread Every Day", and he suggests slowing fermentation by using less yeast. I will try that, and report the results here.
He also has a recipe for sourdough starter, and although it requires a little effort in the beginning, it seems the maintenance, care, and feeding is fairly straightforward. And since I will be baking quite often - usually every second day - then feeding a sourdough starter will be little effort. Look for that information on a different post.
Ingredients:
4 cups bread flour (I used 3 1/2 cup white and 1/2 cup wheat)
*Note: you can use All-purpose flour if you want
1/4 tsp yeast (active dry yeast)
2 cups water
1 1/2 tsp salt
Tuesday, February 1, 2011
Hydration Percentage + Bakers Formulas
Hydration is the ratio of water (weight in grams) to flour (weight in grams), so the Pane Pugliese recipe described in the blog is 452g of water to 625g flour, which is 452/625x100 = 72.32%
Hydration is a measure of how wet the dough is:
•Stiff & Dry- 58 to 60% water content
•Firm & Tight – 60 to 62%
•Modestly Firm – 62 to 63%
•Malleable – 63 to 64%
•Soft – 64 to 65%
•Slack – 65 to 67%
Peter Reinhart lists these classifications:
•Stiff - 50 to 57% water content (bagel, pretzels)
•Standard - 57 to 65% water content (French and other European style breads)
•Rustic - above 65% water content (ciabatta, pizza, focaccia)
Source: Baker's Percentages and Bread Hydration
Professional bakers express their recipes as formulas. The amount of flour always adds up to 100% and the remaining ingredients are a percentage of the total flour, and it’s always by weight, not volume.
Using the Pane Pugliese recipe:
Flour...625g...100%
Water...452g....72.3%
Salt......9g.....1.5%
Yeast.....4g.....0.64%
Peter Reinhart lists these formulas:
Total Flour Weight = Total Weight / Total Percentage
Total Weight = Ingredient Percentage x Total Flour Weight
Ingredient Percentage = Ingredient Weight / Total Flour Weight x 100
Knowing these formulas allows us to scale recipes up or down according to the size loaf (or loaves) that we are trying to create.
One item that throws off the calculations is the inclusion of pre-ferments such as bigas, poolish, pate fermentee, and sourdough or other starters. I personally think that it is easier to include those in the total percentages.
For example, the original recipe for the Pane Pugliese came from Carol Field's The Italian Baker:
1 1/4 tsp active dry yeast (5g or .50%)
1/4 cup warm water
3 cups water room temperature
200 grams of biga
1000 grams of unbleached AP flour
20 grams of salt (2%)
With water at approximately 230g per cup, the 3.25 cups of water would weigh 747.5g
This would be 74.75% hydration. (note to self: recalc this at 236g per cup)
(here is a nice conversion tool:)
Ingredient Conversion
Then the recipe for 750 grams of biga is:
1/2 tsp active dry yeast (2g or .40%)
1/4 cup warm water (57.5g)
1 1/4 cups + 2 tbsp water room temperature (287.5g+28.5g=316g)
500 grams unbleached AP flour
The total water weight is 373.5g (74.75% - same as the recipe!)
The total ingredient weight is 373.5+500= 873.5
BUT we only need 200g of biga, then
Total Flour Weight = Total Weight / Total Percentage
TFW = 200 / 1.75 (175%) = 114g
Ingredient Weight = Ingredient Percentage x Total Flour Weight
Water = .7475 x 114 = 85g
SOOOoo..
The converted recipe would look like this when you include the flour, water, and yeast from the biga:
Flour 1114g
Water 832g (74.68%)
Salt .. 20g (1.79%)
Yeast .. 7g (.63%)
But this makes 2 large loaves or 3 smaller loaves.
If you set the total flour to 625g, then the recipe easily falls into place.
Here is another source for bakers percentage:
Artisan Bread Baking
Here is some great info on yeast dough:
King Arthur Flour
Wednesday, January 26, 2011
No Refrigerator Pane Pugliese
As I continue to experiment with the Pane Pugliese, I was inspired by an episode of Alton Brown's "Good Eats" where he was cooking several dishes in a Dutch Oven because his electricity had gone out during a storm.
Alton Brown
It made me think that waiting two days to bake might be a waste of time, so one evening I created a batch of dough using my published recipe for Pane Pugliese. I let it sit overnight, UNREFRIGERATED, and in the morning I baked it, also according to my previously published technique.
Pane Pugliese The Easy Way
I did make one change - I did not knead the dough with the dough hook as long as I had previously. I only let the dough knead until all of the dough unstuck from the sides of the mixing bowl. This only took a minute or two. I guess you could say "until the dough just came together".
In the past, I have continued to knead the dough, and it always becomes more silky, and spreads out in the bottom of the bowl, and then returns to the sides of the bowl. I had thought that kneading longer would develop more gluten so that it could hold the "breath" of the yeast, but this turns out not to be the case.
Here is what I got: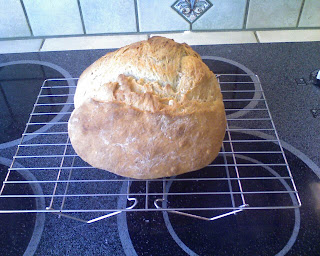
It was very tasty, and the oven spring was great.
Alton Brown
It made me think that waiting two days to bake might be a waste of time, so one evening I created a batch of dough using my published recipe for Pane Pugliese. I let it sit overnight, UNREFRIGERATED, and in the morning I baked it, also according to my previously published technique.
Pane Pugliese The Easy Way
I did make one change - I did not knead the dough with the dough hook as long as I had previously. I only let the dough knead until all of the dough unstuck from the sides of the mixing bowl. This only took a minute or two. I guess you could say "until the dough just came together".
In the past, I have continued to knead the dough, and it always becomes more silky, and spreads out in the bottom of the bowl, and then returns to the sides of the bowl. I had thought that kneading longer would develop more gluten so that it could hold the "breath" of the yeast, but this turns out not to be the case.
Here is what I got:

It was very tasty, and the oven spring was great.
Subscribe to:
Posts (Atom)